
The Telescoping Dipole
I am not your buddi.

Note: Apologies for not publishing in such a long time. I have a number of drafts in various stages, but none are ready. 2025 has been a heck of a busy year with kids growing up**. I think I’ve only made out to do POTA 5 or 6 times.
First Experiences
Like a lot of hams, I felt overwhelmed surveying the world of antennas when I came to HF. And like a lot of hams, I built a dipole right off the bat. In fact it was a linked dipole for 40, 20, 15 and 10 based on the SOTA plans. That experience alone was enough to convince me that building, testing and tweaking antennas was fun.
Then I got into POTA. My starting antenna there was a base-loaded vertical that involved one of those ubiquitous 17ft whips. It got me on to 40 meters. That coil and the whip remains as the only antenna system I’ve ever bought (excluding my MFJ-1866 because it’s listen-only). It also continues to be my POTA go-to because it’s easy to: put up, take down, change bands.
Enter the Buddipole
During those early days I came across the buddipole plans by W3FF. I was getting a lot of enjoyment out of building antennas, so I thought “why not?”. I got the stuff and built one.
And it worked. It worked well in fact. My first DX contacts were using that dipole. I’d hoist it up on my 12m Spiderbeam and be off to the races.
My primary complaint was that it was kind of a pain in the neck to change bands. I’d bring it down, then essentially disassemble it to replace the loading coils. It was cumbersome and a little finicky.
KI5GRD Buddipole Variant
I figured I could improve on this design by using coils that would slide over the dipole arms and reattach using power poles. The coils themselves were just 14 AWG copper with heat-shrink. I designed and 3D printed a “puck tee” that sent the arms out at 5º angles to account for inevitable arm sag.
I was pretty happy with this design. Coil swap outs were quicker. I still use it regularly.
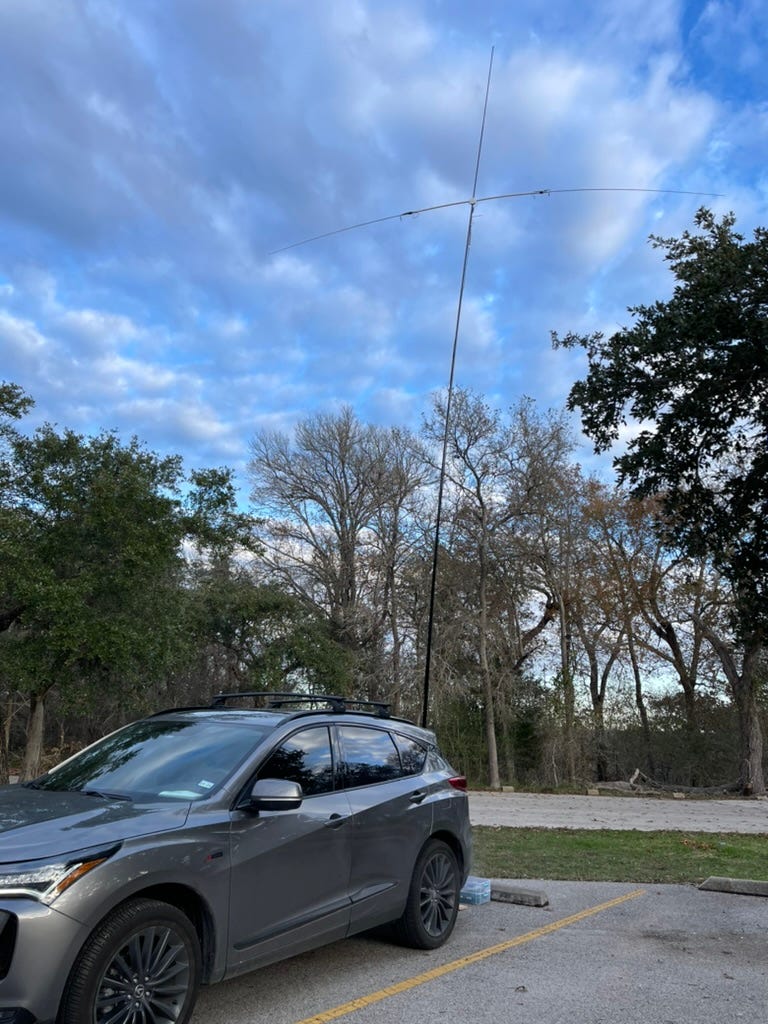
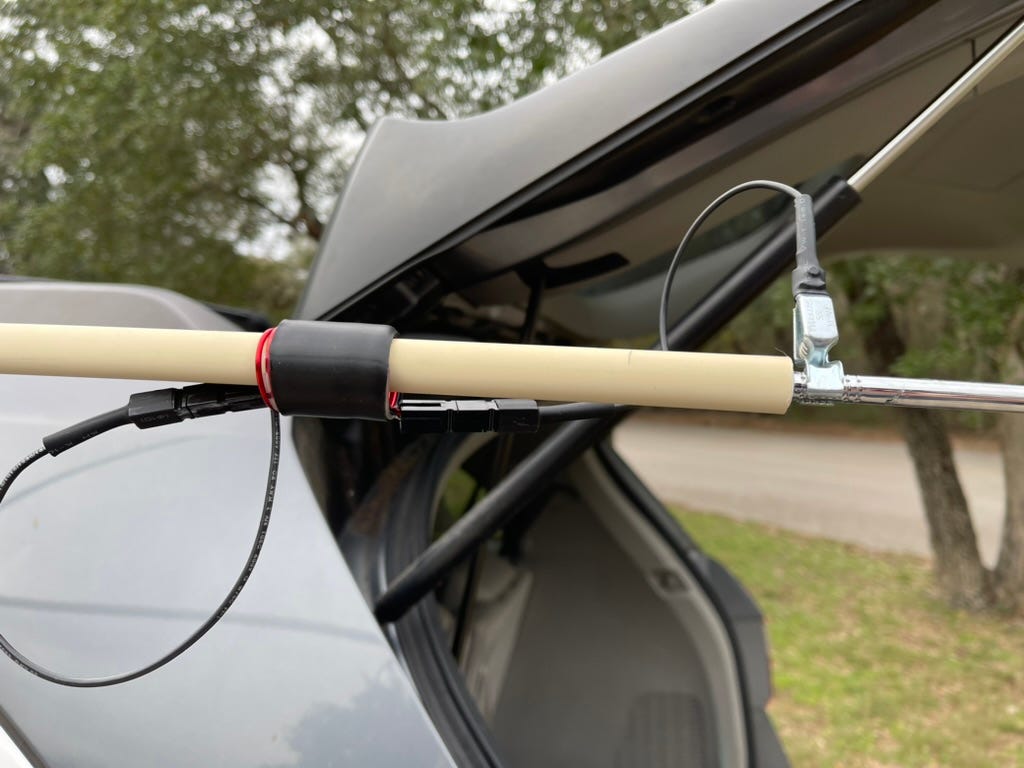
Two Whips and a Hub
Ever the tinkerer, I recently decided I could simplify this setup by just suing two 17ft whips. So I ordered a few from Aliexpress and set about to design a hub that I could slide on to my mast.
To keep the build simple, I decided to let friction keep them in place and have them overlap a little bit. Given that I’m using cheap imported whips, I figured it would be wise to let the print include a some support for the whips. I am tempted to add trusses to help support the whip.
The results are pretty good. I conducted preliminary tests in my back yard last night. I had a sideband QSO with a ham in Colorado using only 10 watts. I plan to take it out during my next POTA excursion.
Anyway, I’m including a build list here so you can make your own if you want.
73, Gary KI5GRD.

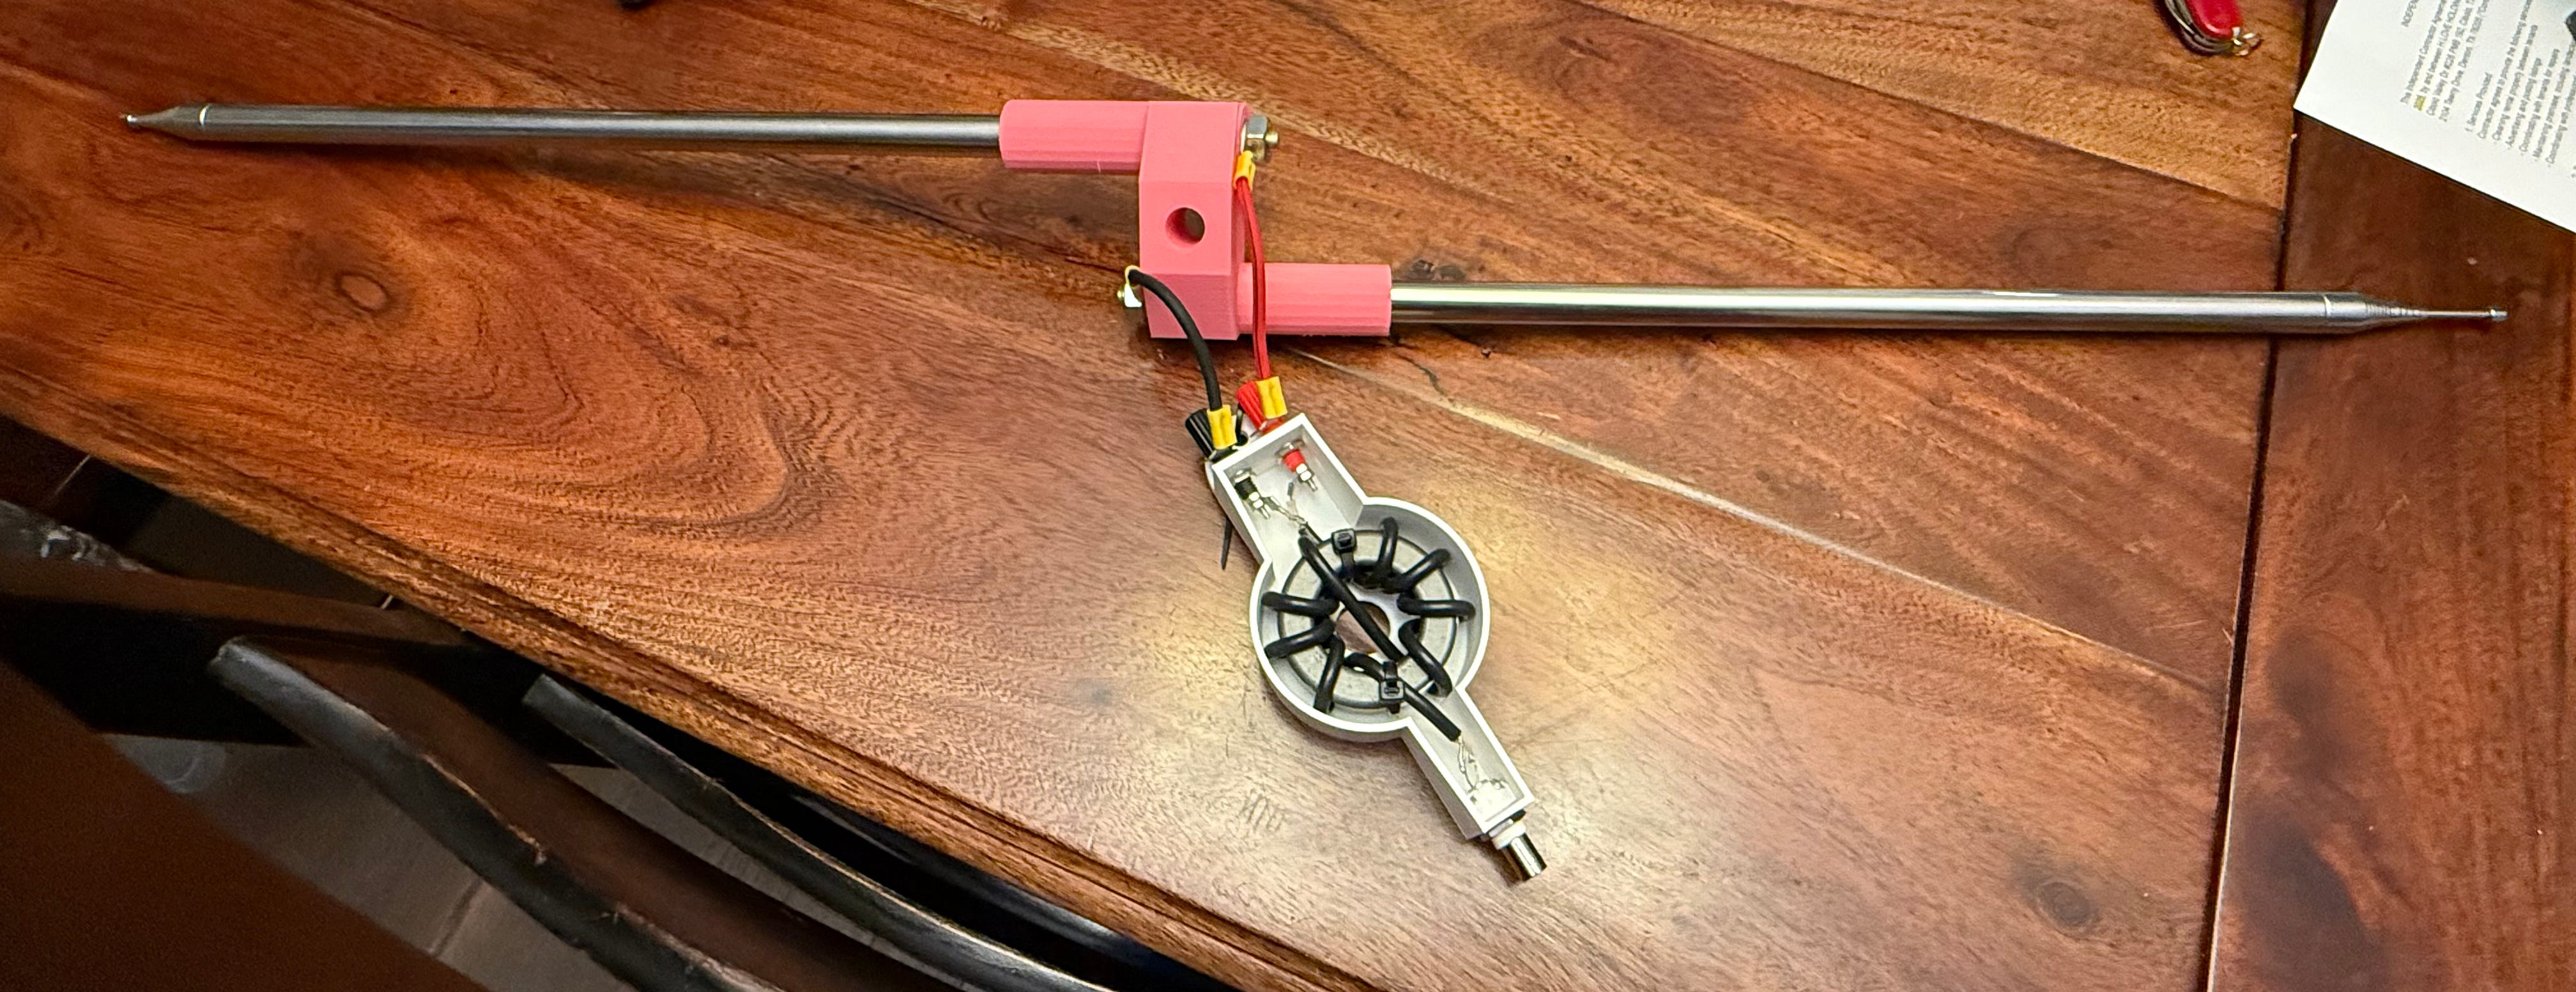
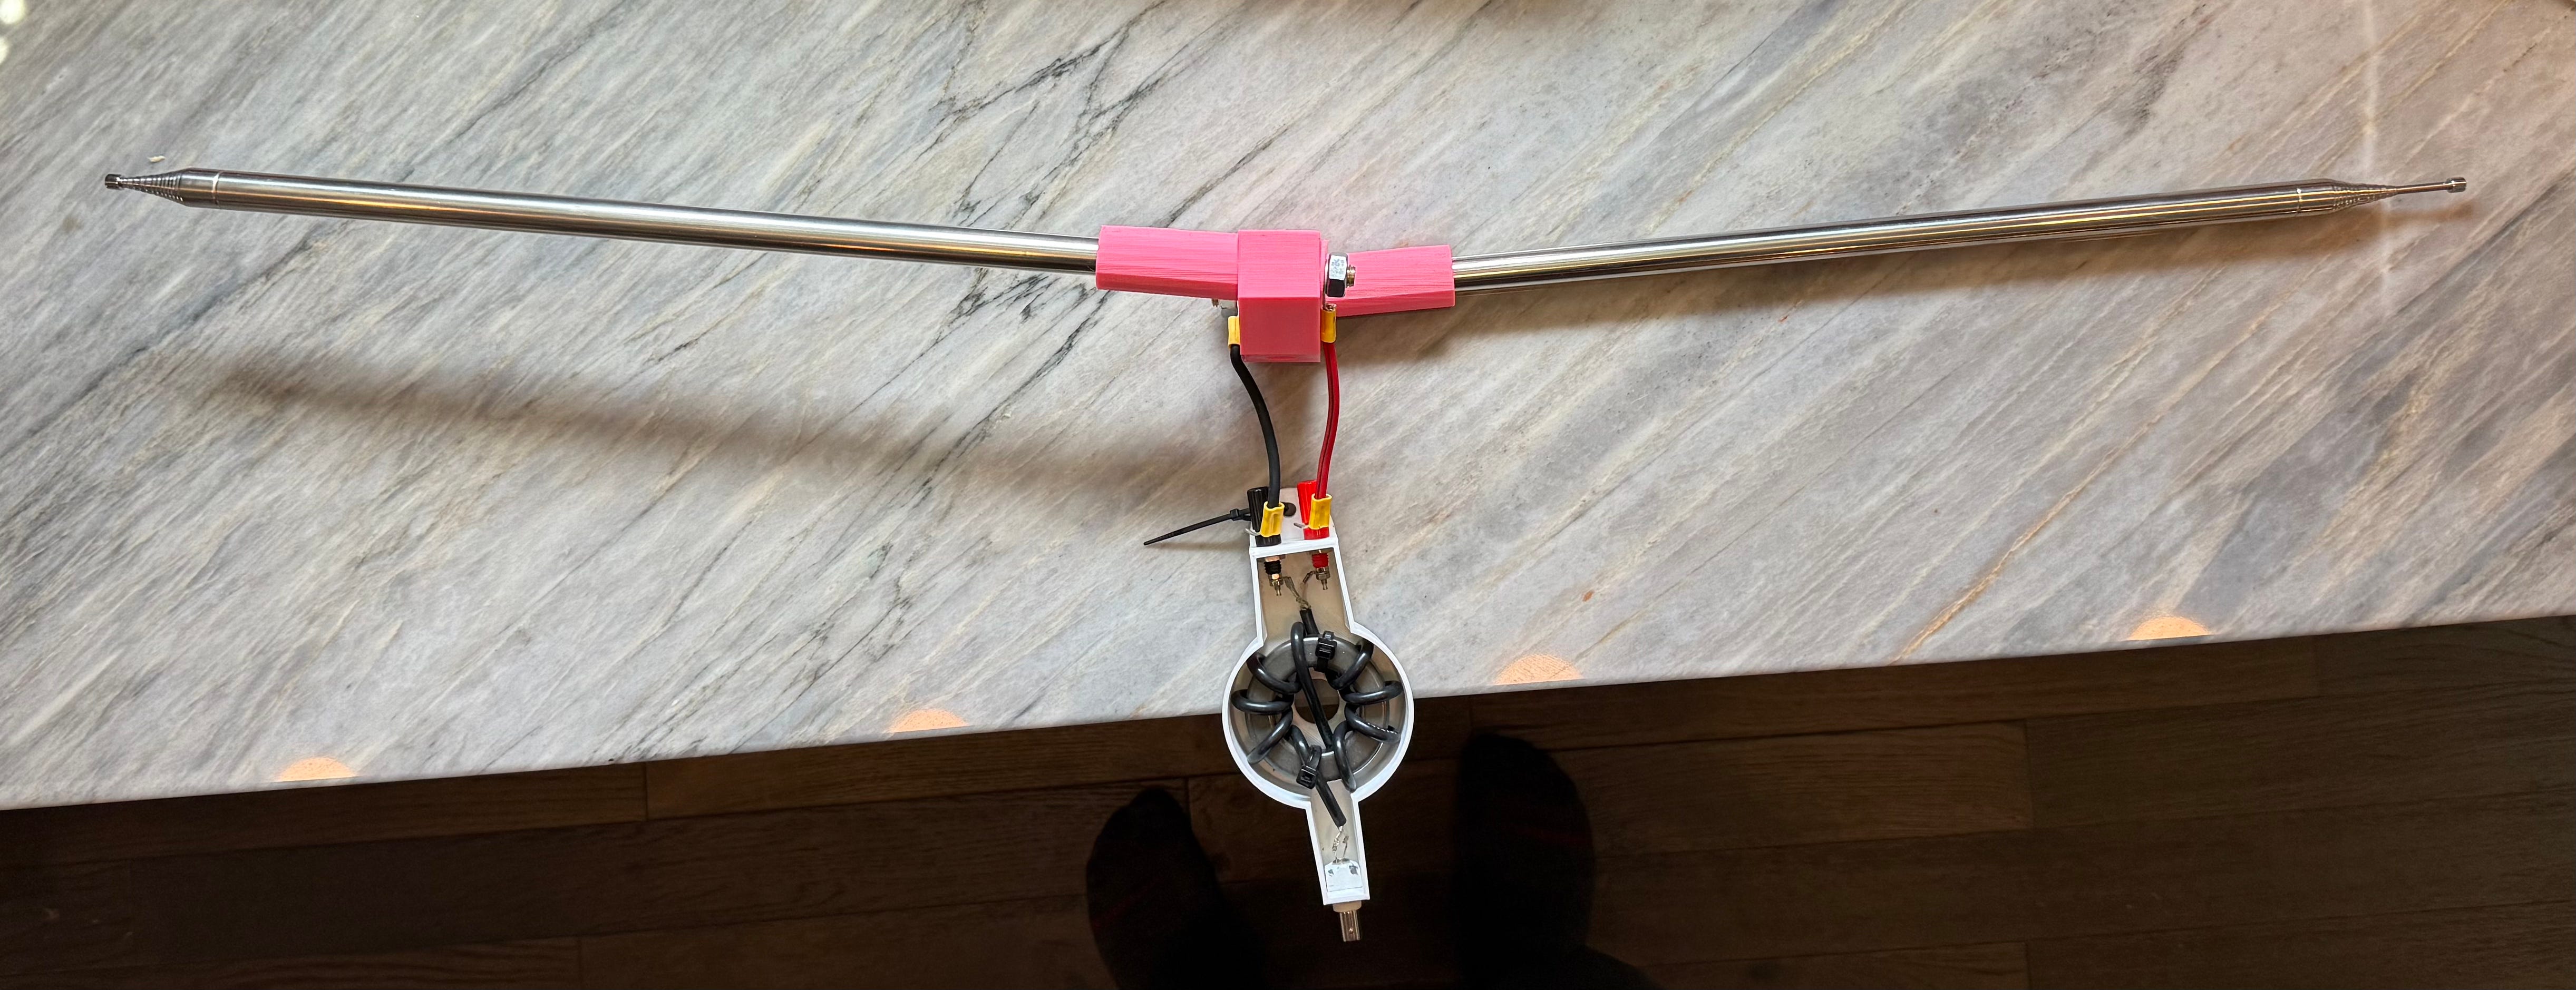
Two-Whip No Load Dipole
2x 5.6m whips. I wouldn’t order these ones again. They are M10 threaded, and each was attached to the brass thread a little differently.
3D printed hub - Tinkercad link.
2x M10 nuts. I got mine from Lowes.
1:1 CMC. Mine is built from a mix 31 toroid and some coax.
Wire to connect things.
Picture Dump - KI5GRD Buddipole Variant
I thought I’d include pictures here. I was very proud of this build at the time.
3D printed puck tee - Tinkercad link.


** Kids growing up…
We’ve had a high school graduation this year, bringing the number of children attending college or otherwise pursing their careers to four. I write a lot of checks and don’t have time for much else. We decided to get into the landlord business by purchasing a rental at one of the kids universities. That’s been a huge time-sink over the spring and summer.
I hope things will slow down this fall. I’d like to get out and do more radio.